
Your first search in 5 minutes
This walkthrough takes you through one complete search using the free Username Search — Search 3000+ sites Module. You will choose a Search type, select the Module, run a search, read the three result counters, open a single result, and bookmark it into a Case. It costs nothing to run, so you can follow along end to end.
By the end you will understand the core loop that every UserSearch search follows: choose a Search type, pick a Module, Search Now, read the results, and save what matters.
Before you start
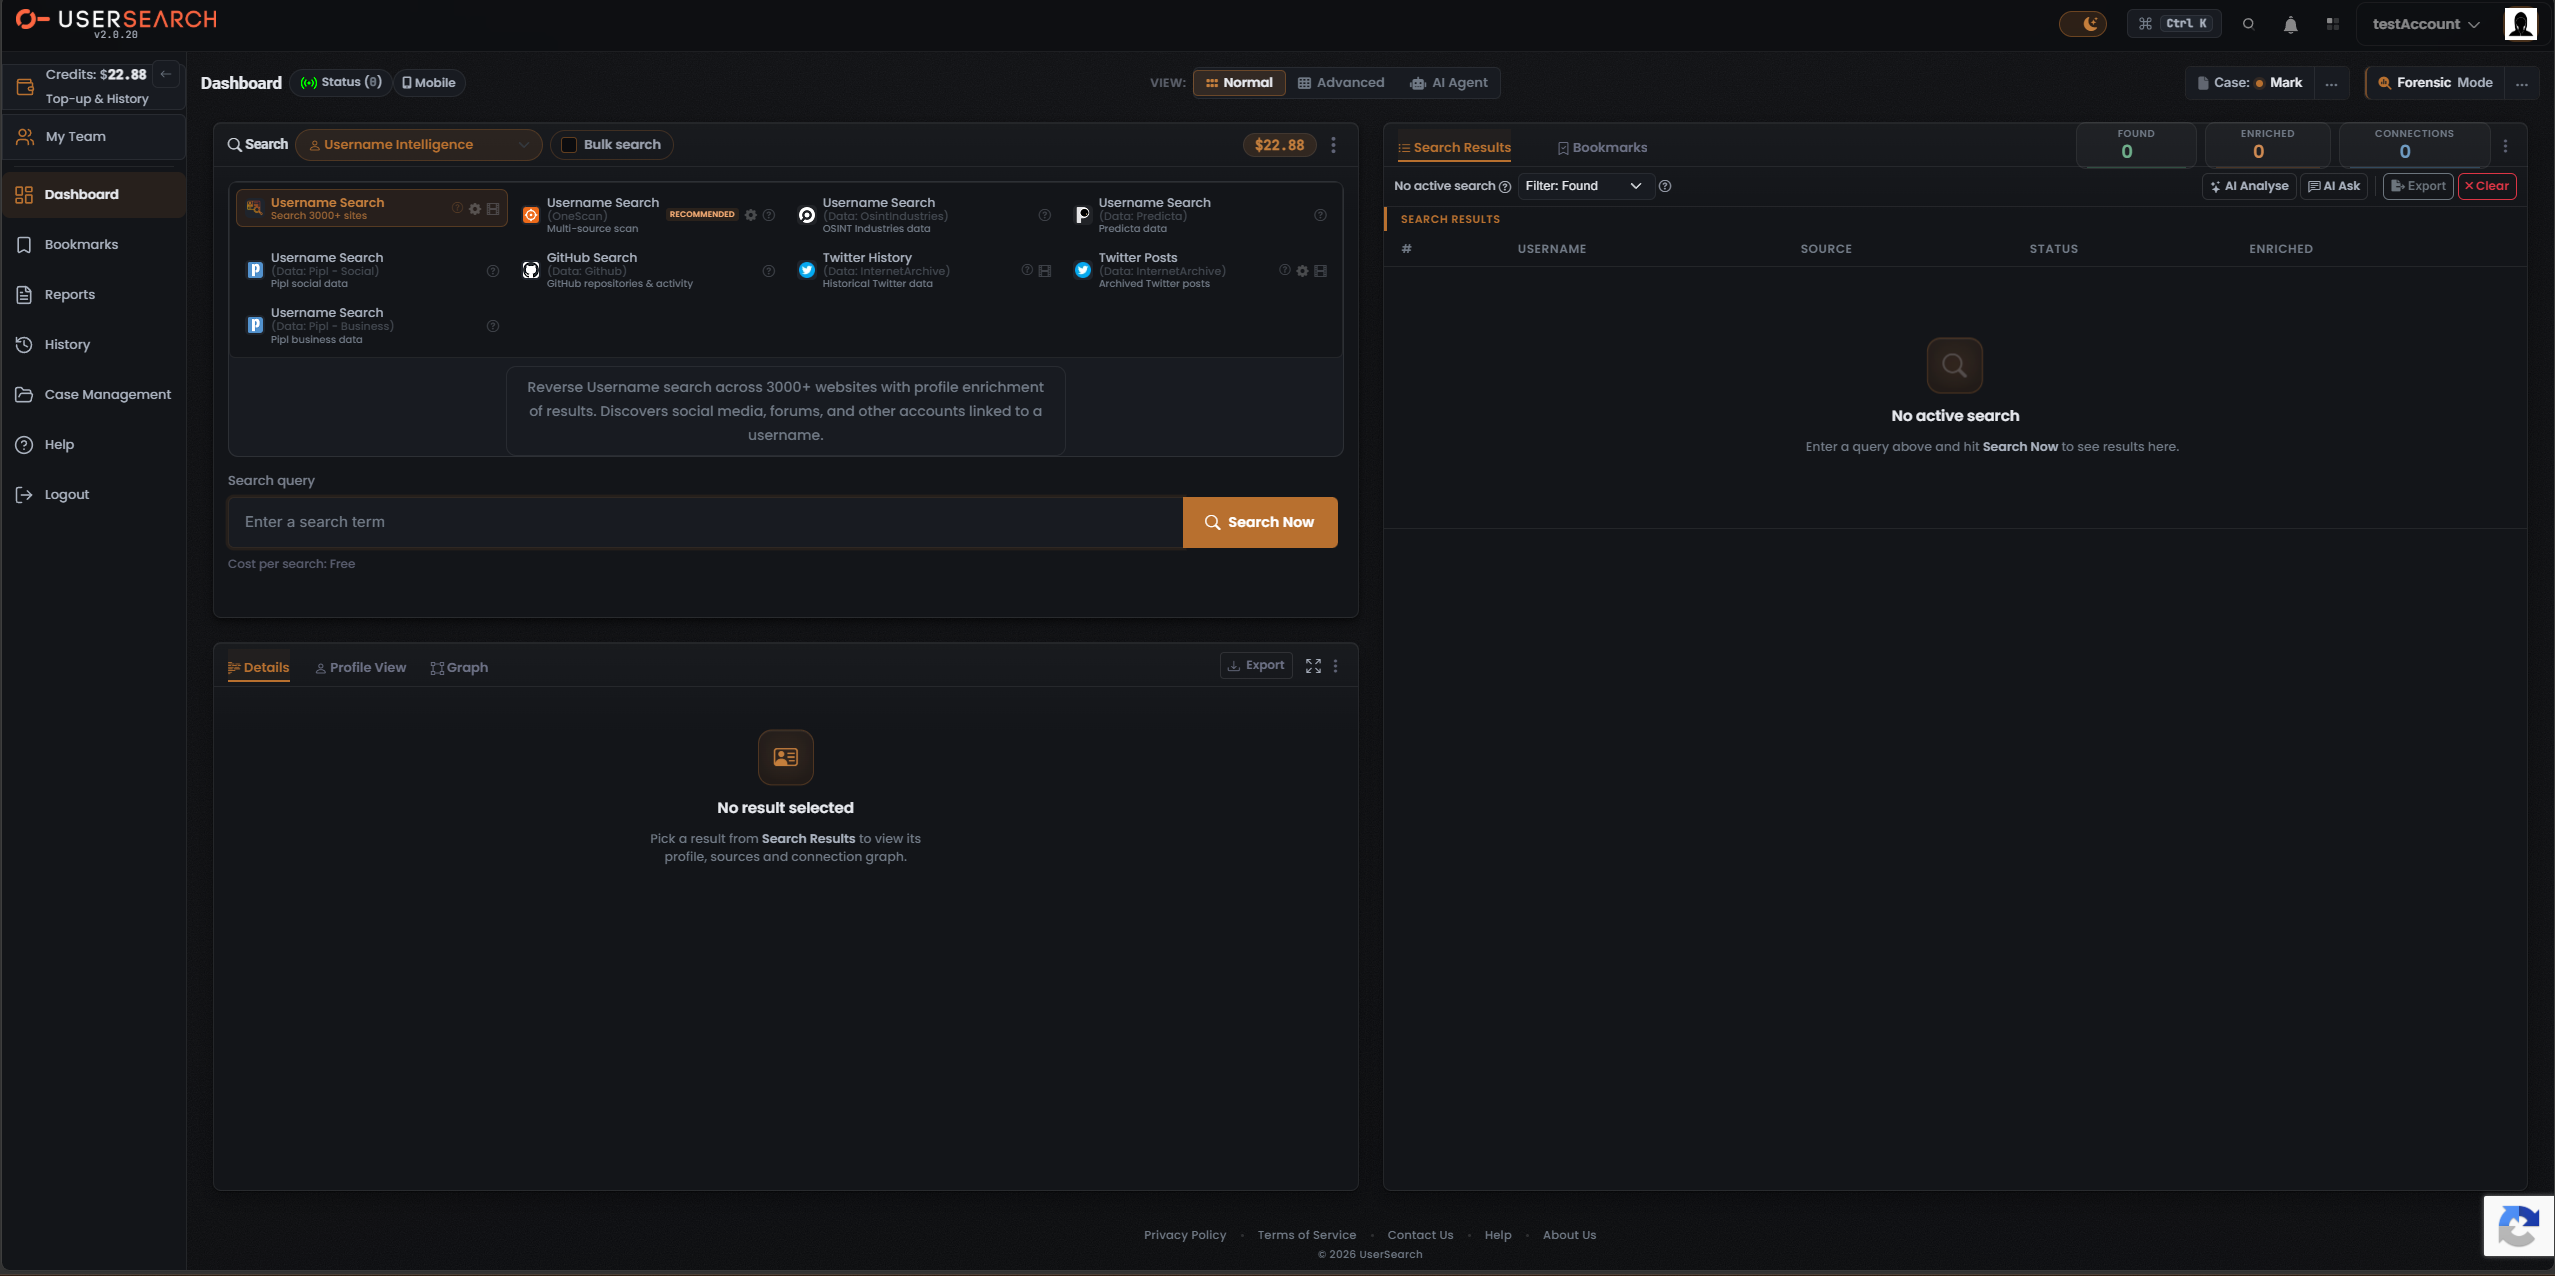
Section titled “Before you start”You need a UserSearch account and access to the Search composer — the left-hand panel where every search is built. Nothing else is required for this walkthrough.
The composer header shows, left to right: the Search title, the Search type selector, the Bulk search toggle, and your Credits balance. You will only touch the Search type selector and the Module grid below it.
Step 1 — Choose the Search type
Section titled “Step 1 — Choose the Search type”A Search type is the top-level bucket that describes what kind of identifier you are investigating. Choosing a Search type determines which Modules appear in the grid below it.
- In the composer header, open the Search type selector (the dropdown with the chevron).
- Choose Username Intelligence.
The Module grid refreshes to show the username-oriented Modules.
Step 2 — Select the free Module
Section titled “Step 2 — Select the free Module”Each Module is a card in the grid. A Module runs one search against a specific data source (the external source that actually holds the data).
- Find the Username Search card, sub-labelled Search 3000+ sites.
- Click it to select it.
A selected card is drawn with a coral-orange border and coral-orange title text. Selecting a Module loads its description, its query field, and its Cost per search line below the grid.
Once selected, confirm you are on the right Module:
- The description panel reads: “Reverse Username search across 3000+ websites with profile enrichment of results. Discovers social media, forums, and other accounts linked to a username.”
- The Cost per search line reads Free.
Step 3 — Run the search
Section titled “Step 3 — Run the search”- In the Search query field, type a username to investigate (for example, a handle you want to trace across the web).
- Confirm the Cost per search line still reads Free.
- Click Search Now.
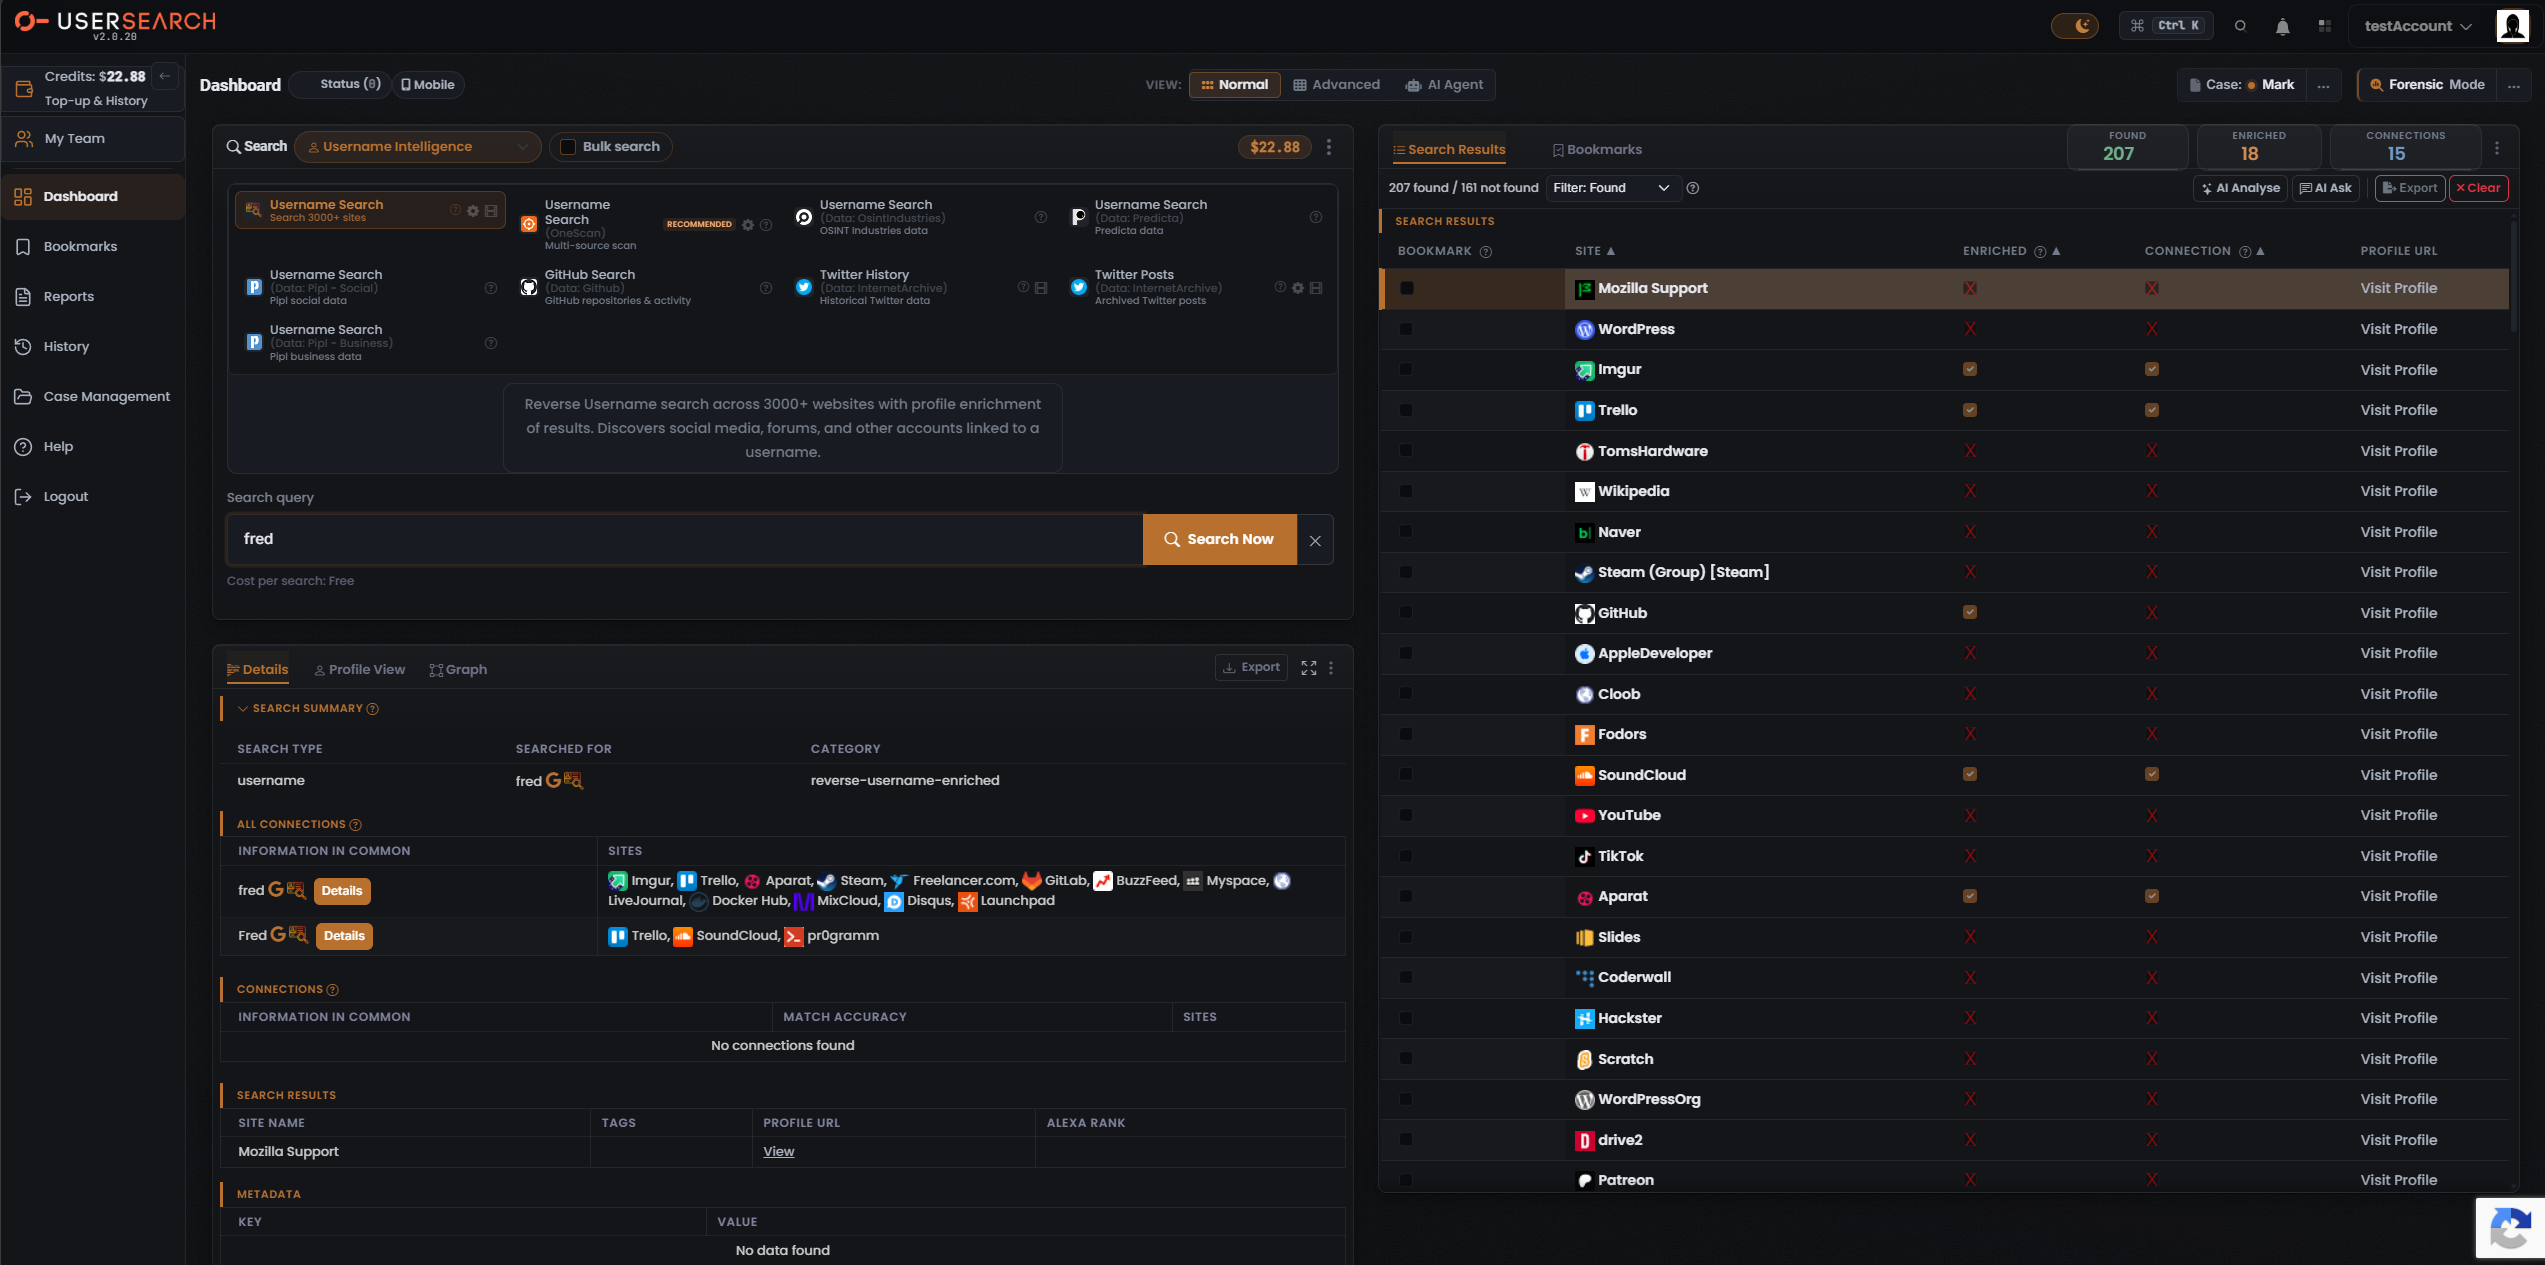
The Search Results panel on the right populates with the results of the sweep.
Step 4 — Read the three counters
Section titled “Step 4 — Read the three counters”Every populated results header carries the same three counters. They count three different things — never treat them as interchangeable.
| Counter | Colour | What it means |
|---|---|---|
| Found | green | The username was located on a site — an account exists there. |
| Enriched | orange | UserSearch holds extra metadata on that account (for example possible names or linked emails). Enriched is always a subset of Found. |
| Connections | white | Relationships or links surfaced between entities — linked-account clusters rather than raw site hits. |
For the Search 3000+ sites Module, the results header also shows a found / not found
sub-line (for example “207 found / 161 not found”): the not-found half is the set of checked
sites where no matching account was located.
Step 5 — Open a single result
Section titled “Step 5 — Open a single result”The results table lists one row per site, with columns Bookmark, Site, Enriched, Connection, and Profile URL.
- Click a row to select it. The lower-left Details panel updates to show that result.
- In the Details panel, review the structured detail for the selected site.
- To open the external profile for a row, use its Visit Profile link in the Profile URL column.
The Enriched and Connection cells are per-row flags — a check (positive) or a red X (negative) — and they are independent of each other. A row can be enriched without being part of a connection, and vice versa.
Step 6 — Save a lead into a Case
Section titled “Step 6 — Save a lead into a Case”A Case is the container that groups your searches, Bookmarks, and Reports. Saving a promising result as a Bookmark files it into the active Case so you can return to it later. Every account starts with a built-in Default Case.
- In the results table, find a row worth keeping.
- Click the checkbox in that row’s Bookmark column.
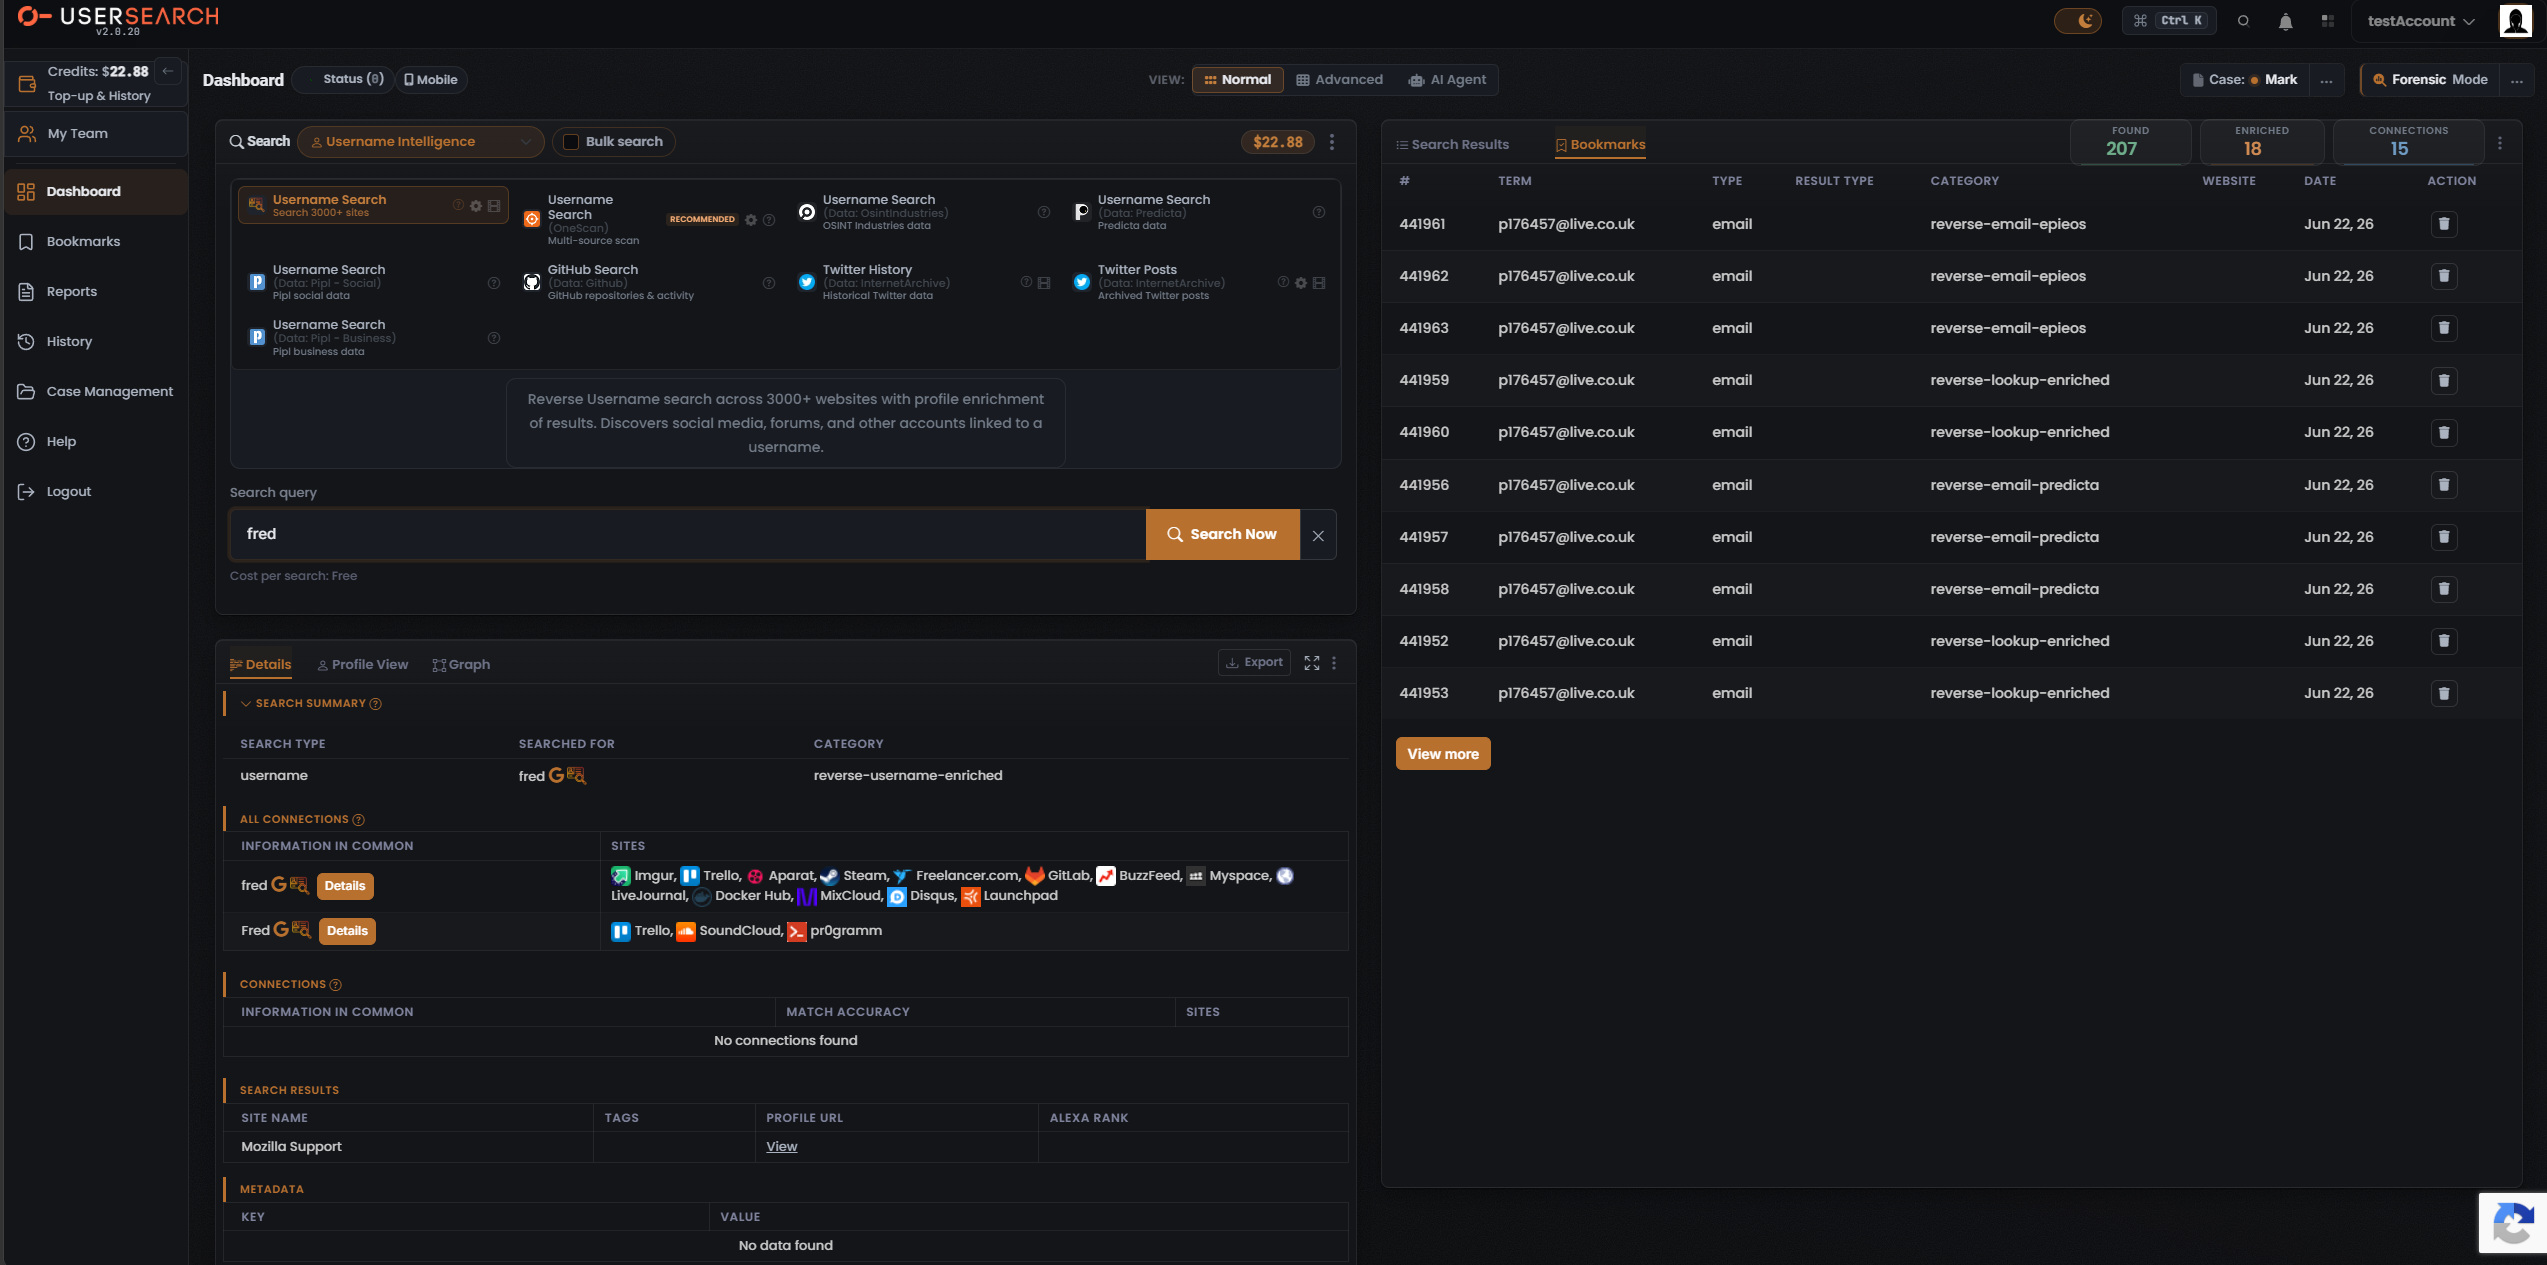
The result is bookmarked into your active Case. You can review saved results by switching the right-hand panel from Search Results to the Bookmarks tab.
What you just did
Section titled “What you just did”You completed one full pass of the UserSearch search loop:
- Search type — you chose Username Intelligence.
- Module — you selected the free Username Search — Search 3000+ sites.
- Search Now — you ran the search for free.
- Read the results — you interpreted Found, Enriched, and Connections.
- Open a result — you inspected one row in the Details panel.
- Save — you bookmarked a lead into a Case.
Where to go next
Section titled “Where to go next”- Try OneScan, the RECOMMENDED multi-source Module that runs one username across several data sources at once for broader coverage. Its cost is dynamic — the sum of the data sources you leave enabled — so check the Cost per search line before running it.
- Explore other Search types to investigate different identifier types.
- Organise longer searches by creating and switching Cases, and enable Forensic Mode on a Case when you need a durable, audit-trail record.
Verified against UserSearch v2.0.20