
Top up your credits
Credits are UserSearch’s prepaid usage currency: every search costs zero or more Credits, deducted from a running balance. When your balance runs low, you top it up on the Account Credits & Team Licenses page. This guide walks through the top-up controls, the one-time versus monthly choice, checkout, and Auto-topup.
Before you start
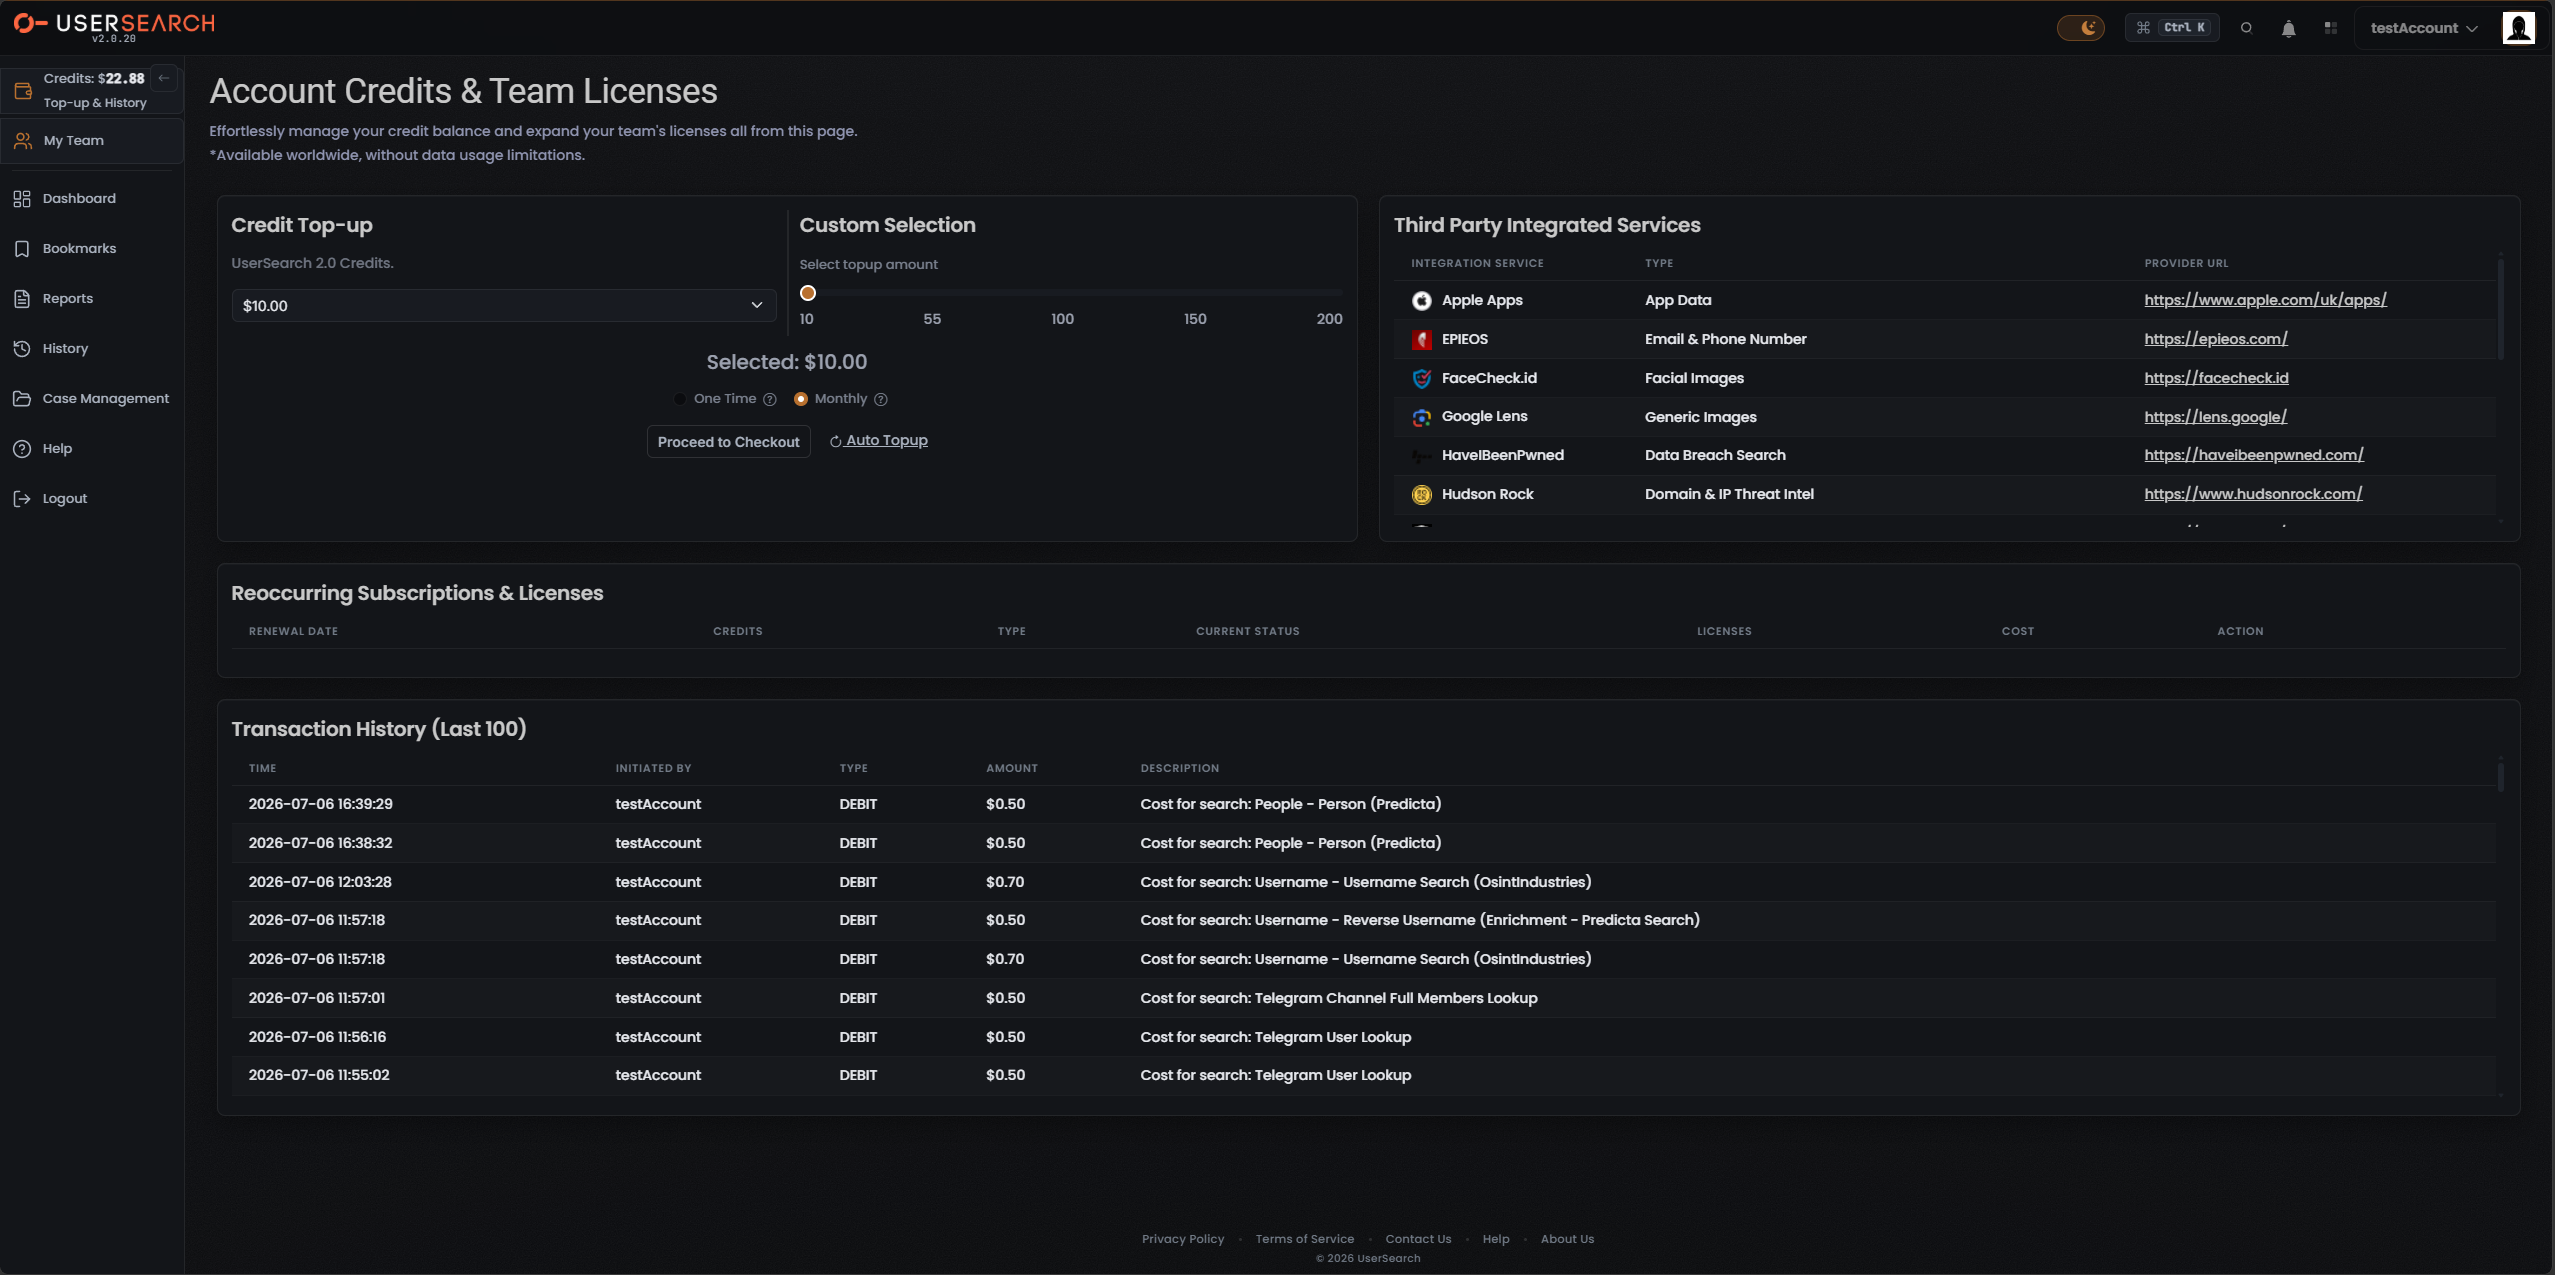
Section titled “Before you start”Your current balance appears in the top bar as Credits (for example, Credits: $22.88), next to the Top-up & History label. Note that Credits are displayed with a currency symbol ($) rather than an abstract point count.
Open the top-up page
Section titled “Open the top-up page”- In the left navigation, open the Credits / Top-up & History widget (or the My Team entry point that reaches this page).
- The Account Credits & Team Licenses page opens. The Credit Top-up and Custom Selection panels sit near the top of the page.
Choose a top-up amount
Section titled “Choose a top-up amount”There are two coordinated ways to set the amount you add to the Global UserSearch 2.0 Credits pool.
Option A — the Credit Top-up dropdown
Section titled “Option A — the Credit Top-up dropdown”In the Credit Top-up panel (labelled UserSearch 2.0 Credits), a dropdown shows the current amount (for example, $10.00). Open it to pick from a list of preset top-up amounts.
Option B — the Custom Selection slider
Section titled “Option B — the Custom Selection slider”The Custom Selection panel, headed Select topup amount, holds a horizontal slider with tick labels at 10, 55, 100, 150, 200. Drag the handle to set your amount; a live readout below the slider shows your choice, for example Selected: $10.00.
Choose One Time or Monthly
Section titled “Choose One Time or Monthly”Below the slider are two mutually exclusive options, each with a help (?) icon:
- One Time — a single purchase that adds your chosen amount once.
- Monthly — a recurring amount charged on a monthly cycle.
Select the one you want; only one can be active at a time.
Proceed to checkout
Section titled “Proceed to checkout”- Confirm your amount in the Selected readout and your choice of One Time or Monthly.
- Select Proceed to Checkout to advance to the payment flow.
Set up Auto-topup
Section titled “Set up Auto-topup”Next to Proceed to Checkout is an Auto Topup control (a circular-refresh icon). Use it to configure automatic recurring top-ups so your balance is replenished when it runs low.
After topping up
Section titled “After topping up”Once a top-up completes, your new balance is reflected in the top-bar Credits display. Search charges are recorded in Transaction History (Last 100) on the same page, where each row lists the TIME, INITIATED BY, TYPE (for example, DEBIT), AMOUNT, and DESCRIPTION of the charge.
Verified against UserSearch v2.0.20