
Export results and generate a report
In UserSearch, a saved result becomes exportable evidence through three linked pages: Bookmarks (individual saved results), Reports (the list of generated Report files), and History (your search-and-login activity log). This guide shows how to bookmark results, generate a Report from the Bookmarks page, and download the finished file from the Reports page.
Bookmark, Export, and Report are different things
Section titled “Bookmark, Export, and Report are different things”Keep these three terms distinct — they are not interchangeable:
| Term | What it is |
|---|---|
| Bookmark | A single saved result, associated with a Case, kept for later review and export. |
| Export | An ad-hoc download of the current results table. |
| Report | A generated .xlsx artefact built from saved results and stored in a Case. |
1. Bookmark a result
Section titled “1. Bookmark a result”A Bookmark is one saved result tied to a Case. You create bookmarks from the results surface; each saved result then appears on the Bookmarks page.
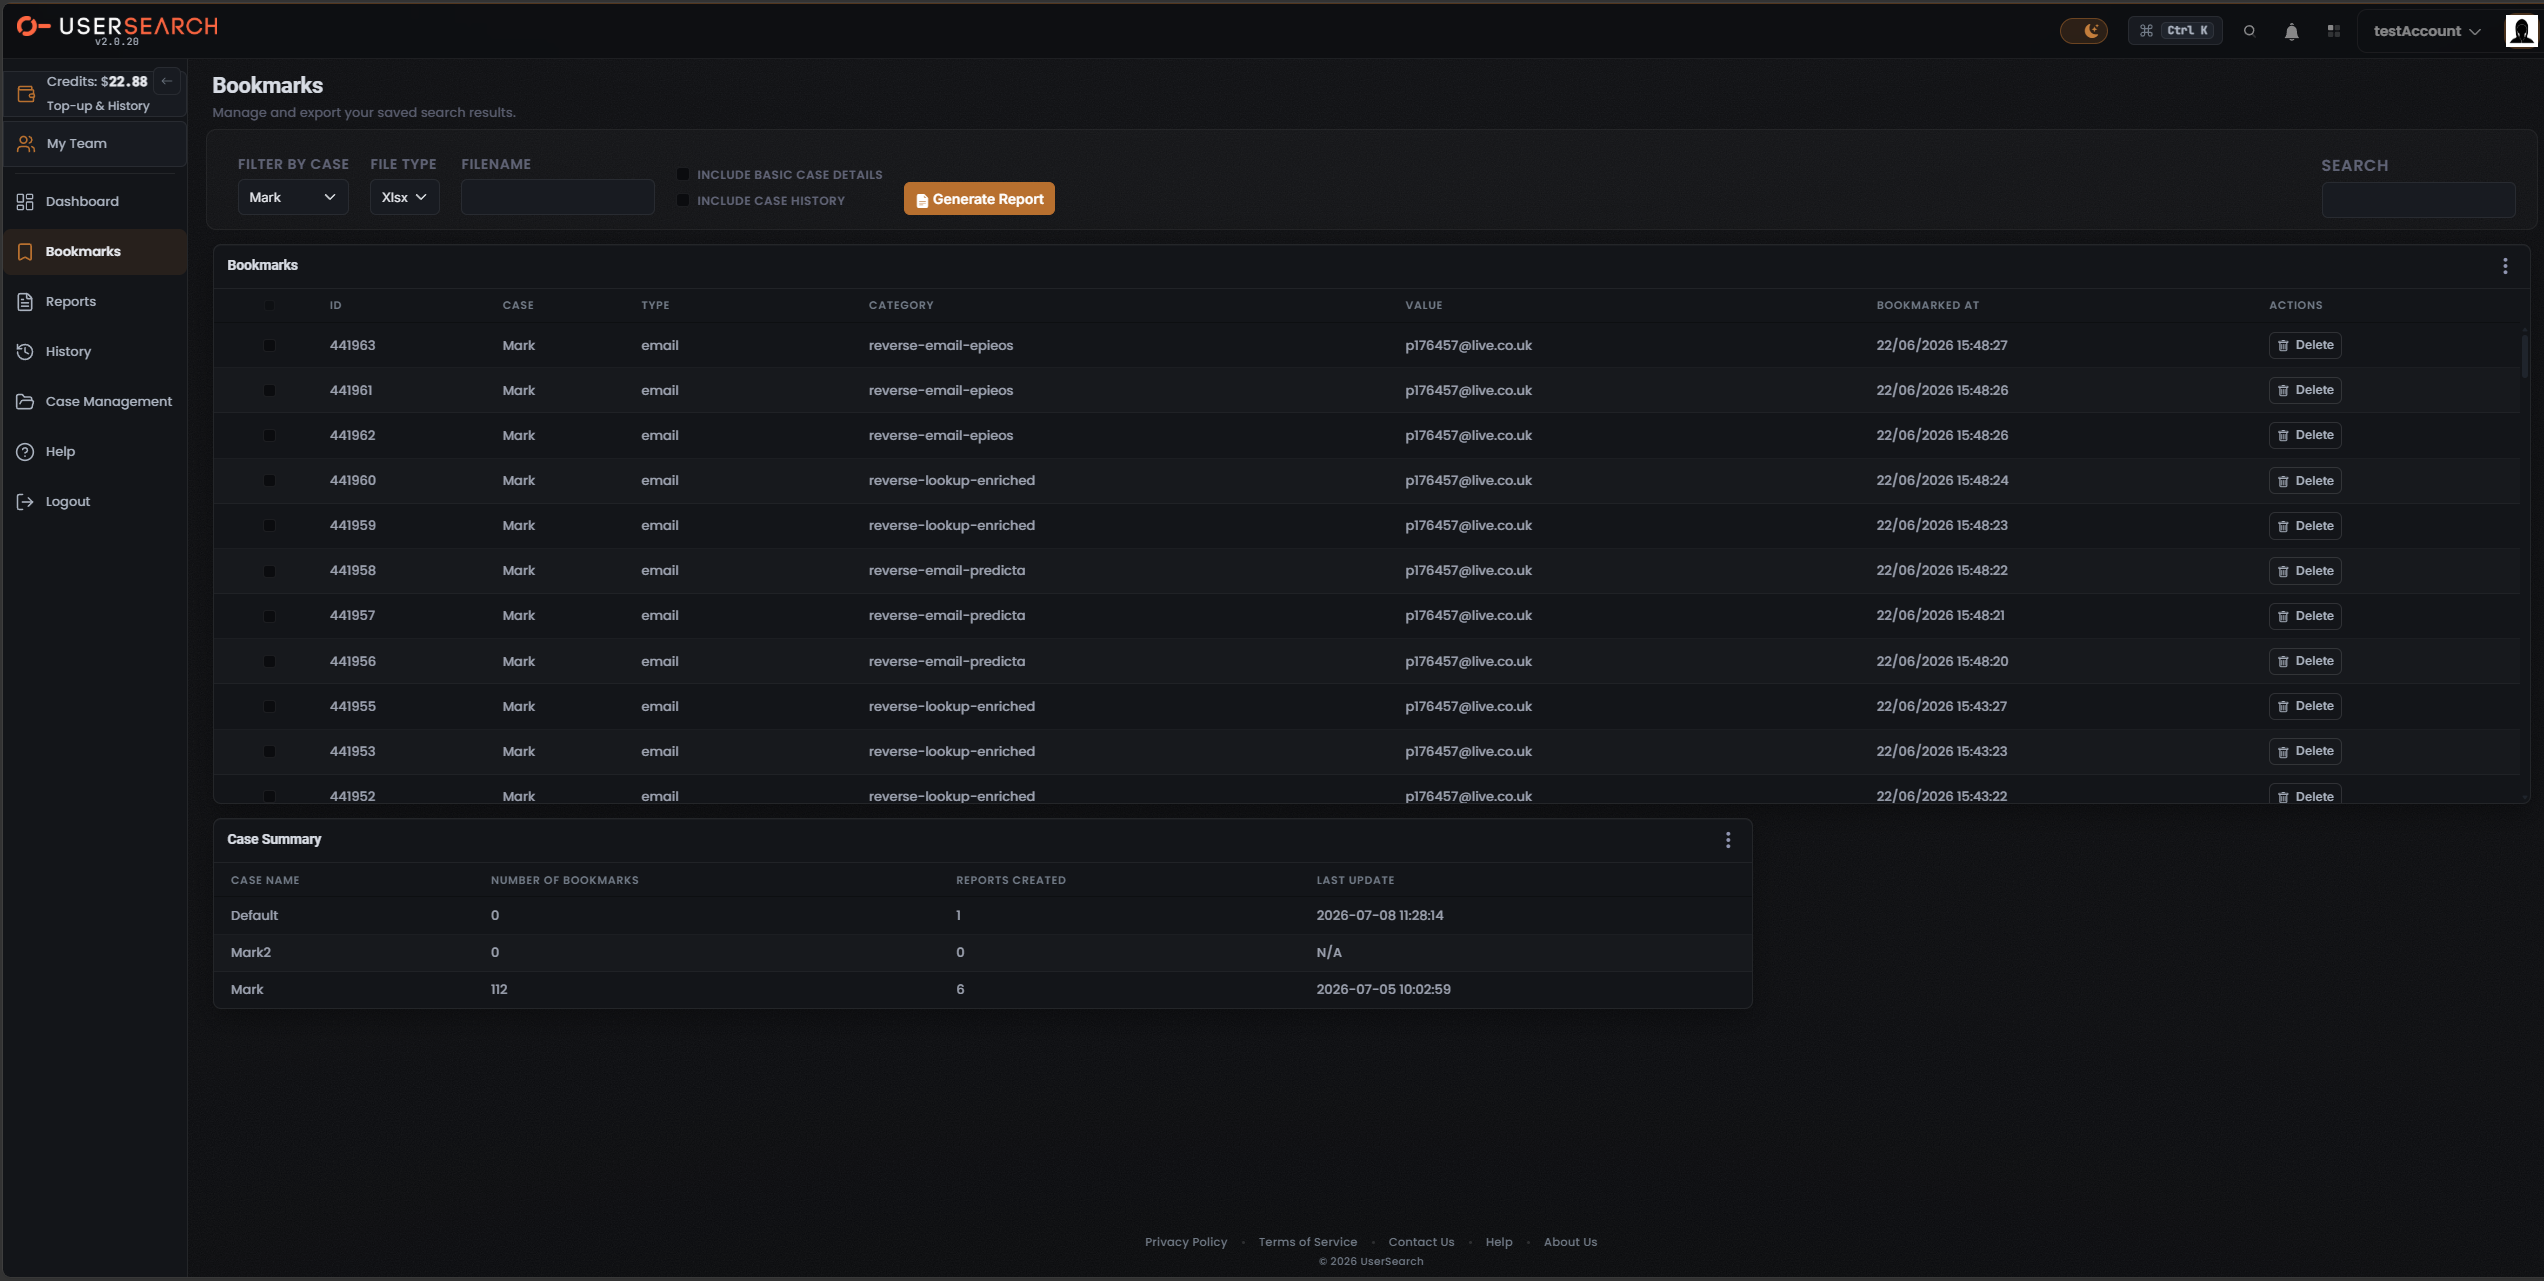
Each bookmark records the Search type (the data source or enrichment source) behind the saved result — for example reverse-email-epieos, reverse-email-predicta, or reverse-lookup-enriched.
2. Open the Bookmarks page
Section titled “2. Open the Bookmarks page”Select Bookmarks in the left navigation. The page is titled with the subtitle “Manage and export your saved search results,” and it has two stacked working areas — the Report-generation panel at the top and the Bookmarks table below it — followed by the shared Case Summary panel.
The Bookmarks table lists your saved results with these columns: a select-checkbox, ID, CASE, TYPE, CATEGORY, VALUE, BOOKMARKED AT, and ACTIONS. The table scrolls vertically when there are more rows than fit on screen. Each row’s ACTIONS column has a Delete (trash icon) button that removes that single bookmark.
3. Generate a Report
Section titled “3. Generate a Report”Reports are generated from the Bookmarks page. The Reports page (Step 4) only lists, downloads, and deletes them.
In the Report-generation panel at the top of the Bookmarks page, set the following controls, then create the file:
- FILTER BY CASE — choose the Case whose bookmarks the Report should cover. This also restricts the Bookmarks table to that Case.
- FILE TYPE — choose the export format. The captured option is Xlsx.
- FILENAME — name the generated Report file. Leave it empty to accept the default name.
- INCLUDE BASIC CASE DETAILS — toggle on to embed basic case details into the Report.
- INCLUDE CASE HISTORY — toggle on to embed the case history into the Report.
- Select Generate Report (the coral button with a document icon).
The Report is produced from your selected Case, file type, filename, and include options, and the finished artefact then appears on the Reports page.
4. Download the Report from the Reports page
Section titled “4. Download the Report from the Reports page”Select Reports in the left navigation (subtitle: “View and download generated reports”). The Saved Reports panel carries the note “Creation of reports can be done in the bookmarks page,” confirming that Reports are generated on Bookmarks and only listed, downloaded, and deleted here.
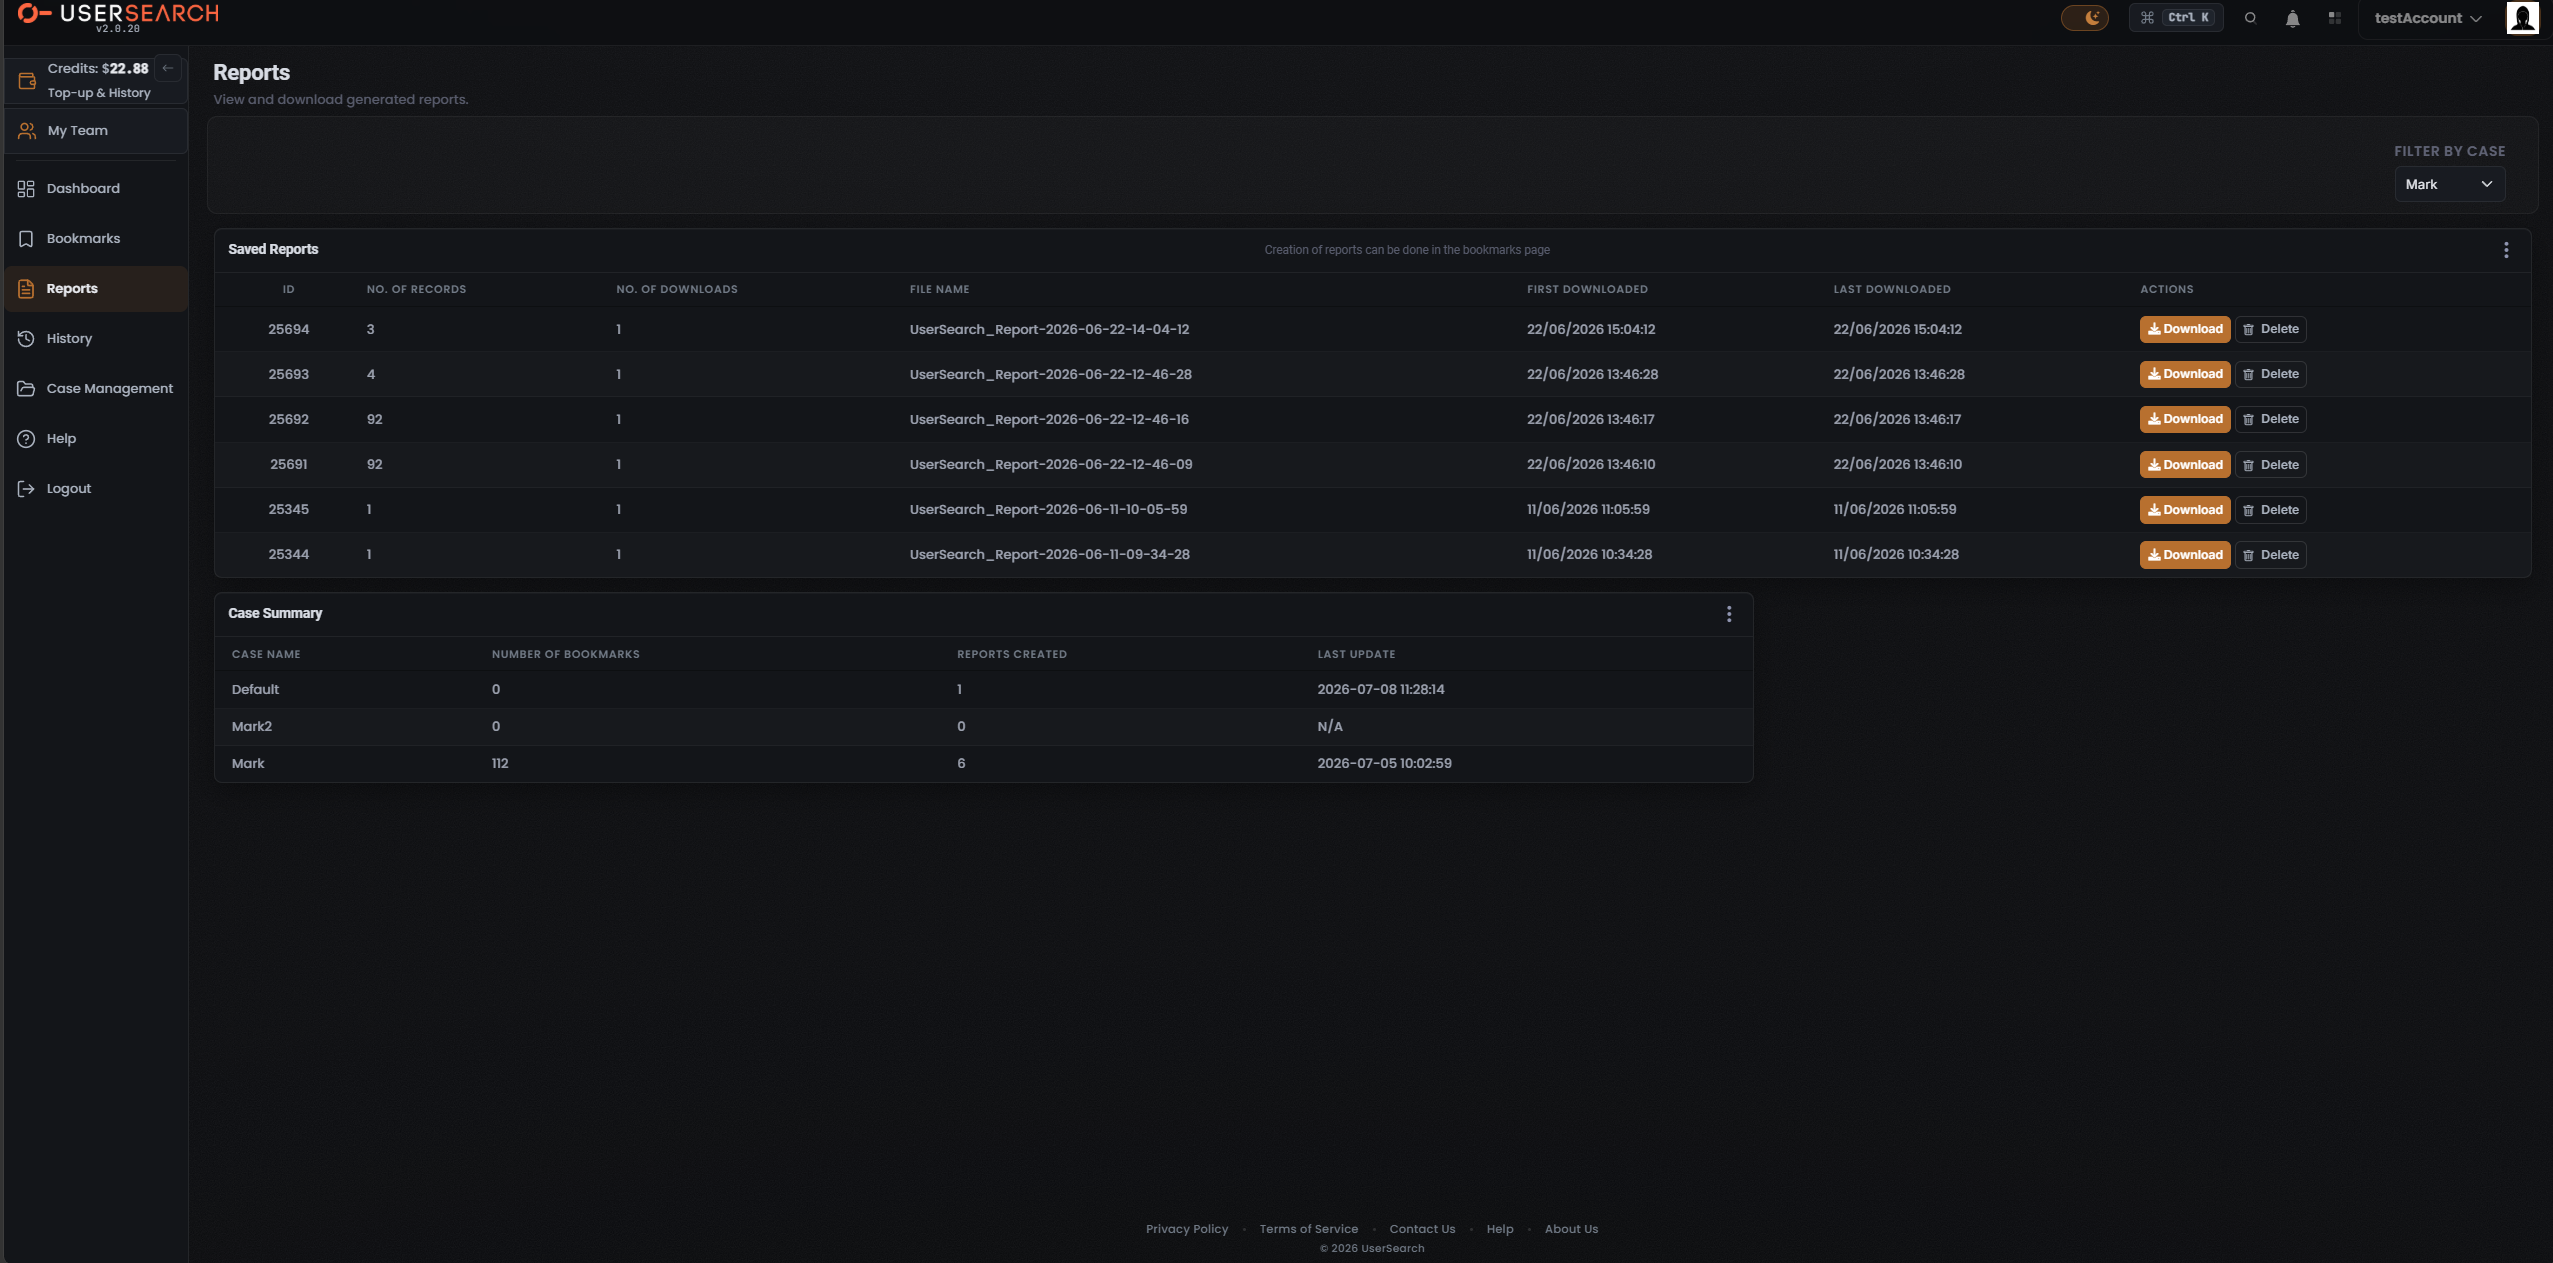
- Use the FILTER BY CASE dropdown (top-right of the content area) to filter the Saved Reports table to a single Case.
- The table columns are: ID, NO. OF RECORDS, NO. OF DOWNLOADS, FILE NAME, FIRST DOWNLOADED, LAST DOWNLOADED, and ACTIONS.
In a Report row’s ACTIONS column:
- Select Download (orange button) to download that Report’s file. Downloading increments its NO. OF DOWNLOADS.
- Select Delete (trash icon) to remove the Report from the list.
5. Export a report from History (optional)
Section titled “5. Export a report from History (optional)”The History page (subtitle: “Review and manage your search history”) logs your account’s past searches and logins — it is not the billing Transaction history. History is retained for Cases with Forensic Mode on and is not kept for Private cases (per Lee, 2026-07-08).
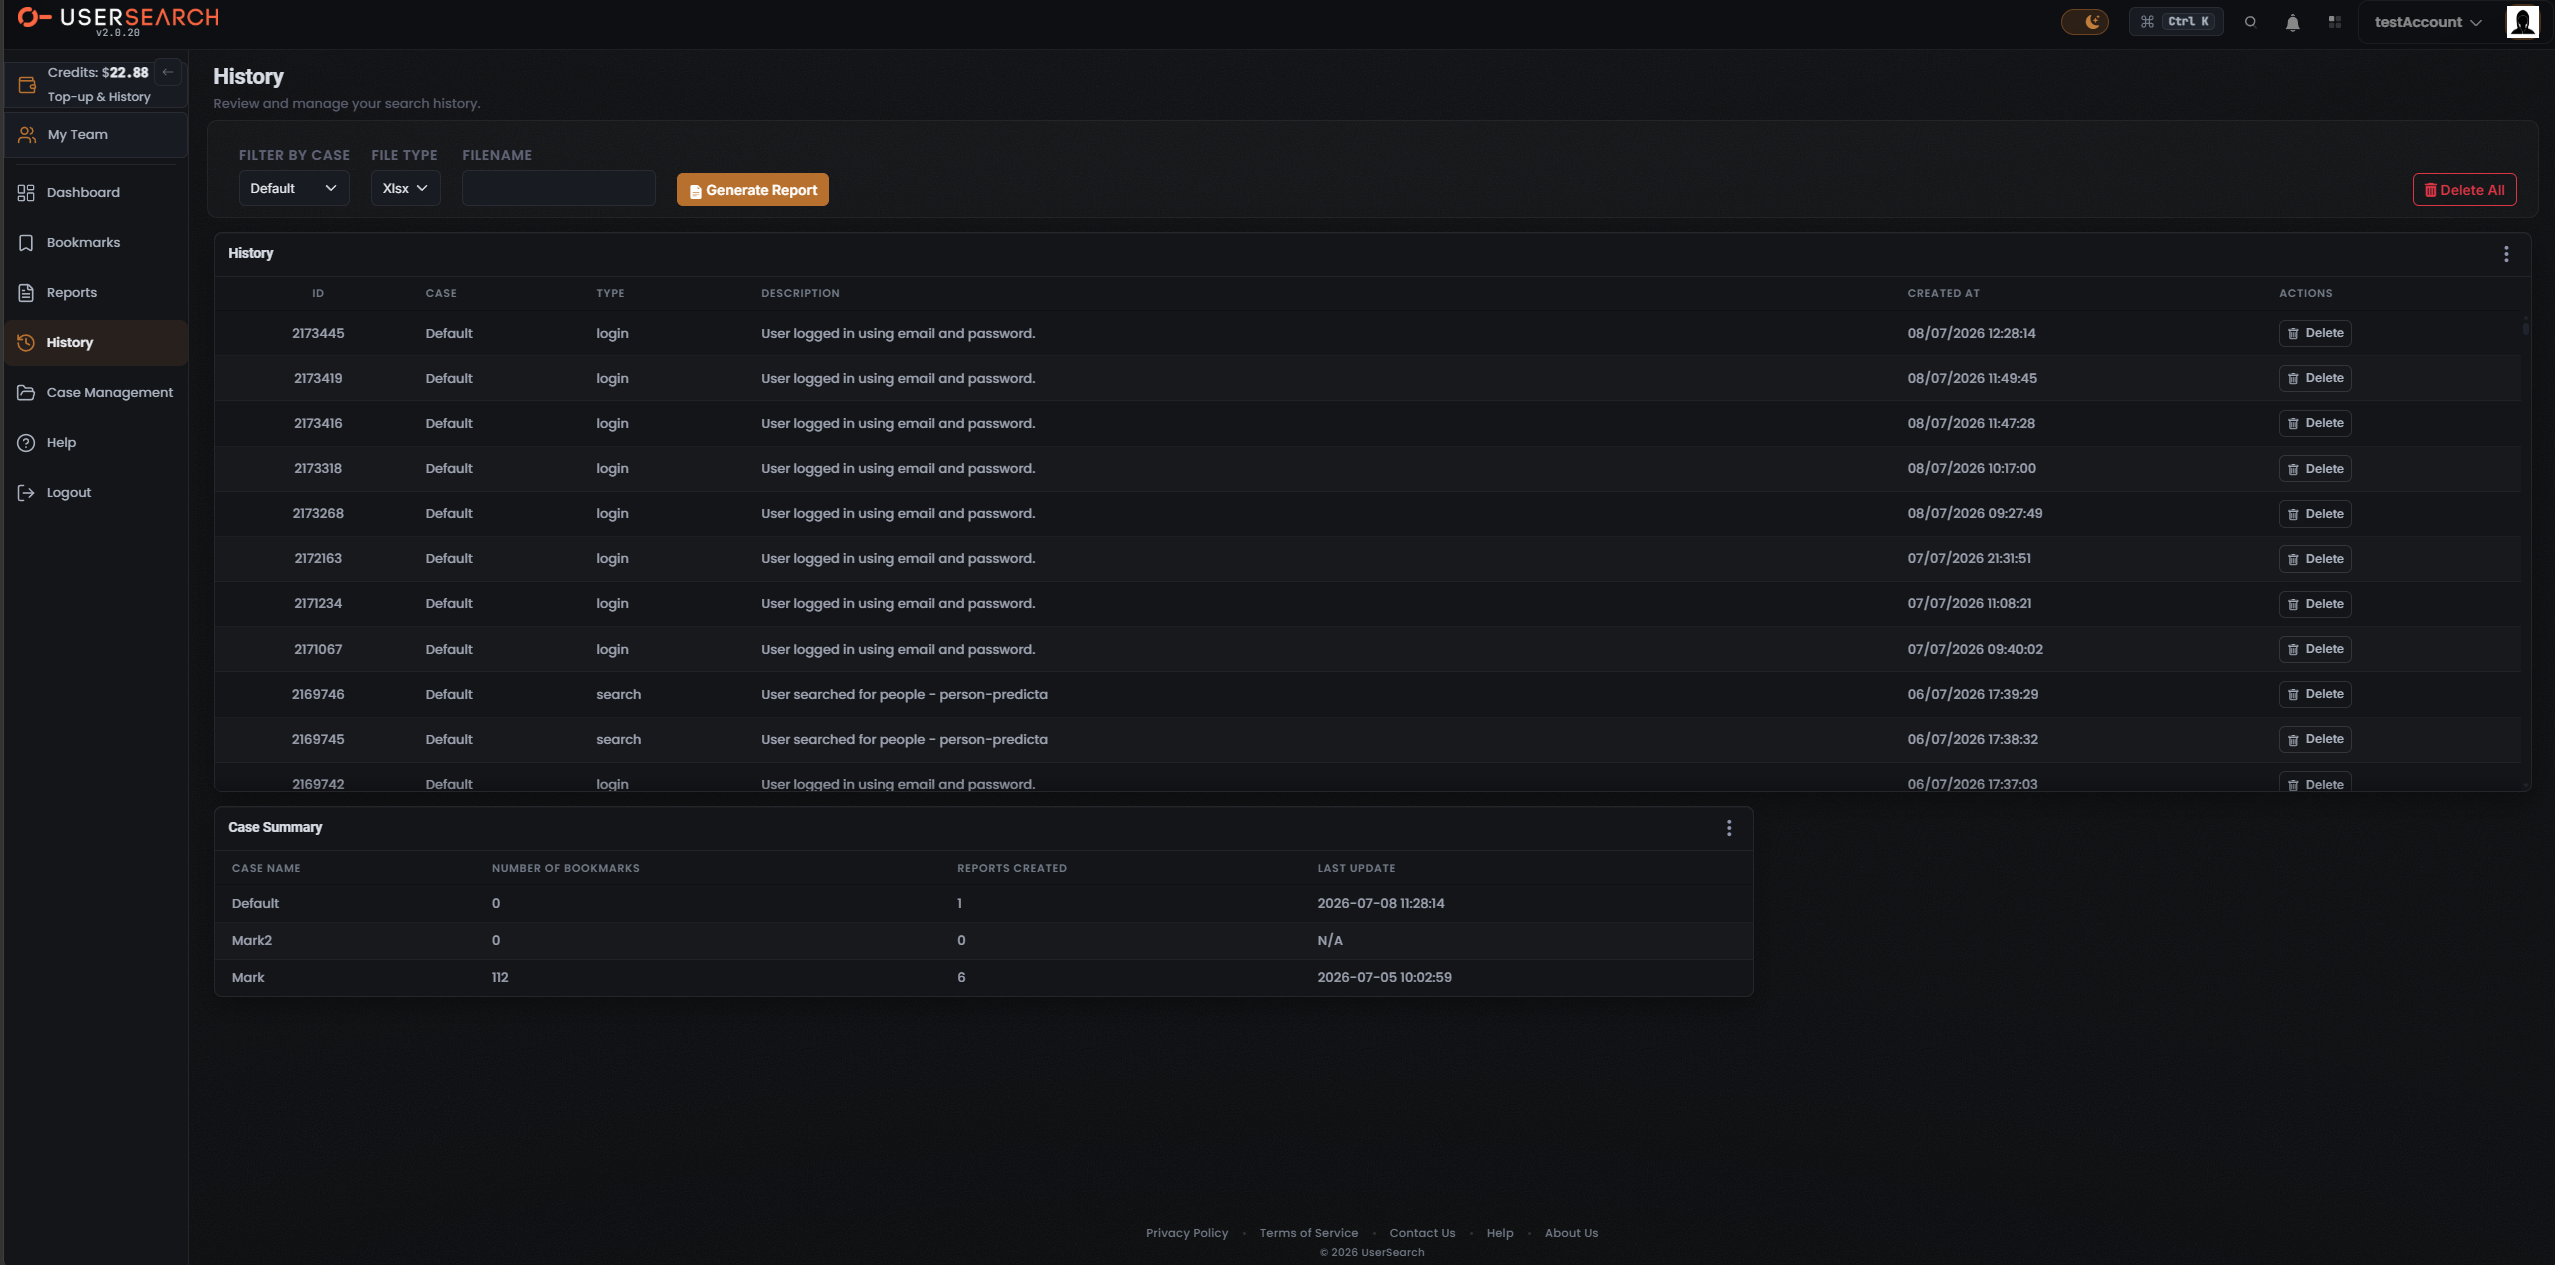
History has its own report-generation controls:
- FILTER BY CASE — filter history entries by Case.
- FILE TYPE — the export format (captured value Xlsx).
- FILENAME — name the generated report file.
- Select Generate Report (orange button) to produce a downloadable report from the case, file type, and filename.
The History table lists entries with columns ID, CASE, TYPE, DESCRIPTION, CREATED AT, and ACTIONS. TYPE is either login (“User logged in using email and password.”) or search (“User searched for people…”). Each row’s ACTIONS column has a Delete (trash icon) button that removes that single entry.
Case Summary panel
Section titled “Case Summary panel”The bottom of the Bookmarks, Reports, and History pages shares a Case Summary panel. It aggregates per-Case totals with the columns CASE NAME, NUMBER OF BOOKMARKS, REPORTS CREATED, and LAST UPDATE. A LAST UPDATE of N/A indicates the Case has no recorded activity to timestamp. The listed cases match those offered in the FILTER BY CASE dropdowns.
Verified against UserSearch v2.0.20